
“The hell with the rules. If it sounds right, then it is.” ― Eddie Van Halen
“Works of art make rules; rules do not make works of art.” ― Claude Debussy
TEACHERS! PARENTS! STUDENTS!
Here you will find some useful how-to advice, tips and tutorials that will help make you a better player, performer, writer, and all-round musician. Many thanks to my students and my peers in the music education community for their role in helping me develop these resources!
The videos are brief and get directly to the point, so enjoy!

“Always plays the same strum!!!”
THINK about it . . .
 Technology is nice to have, but sometimes we need to remind ourselves that it is merely a tool, and not the point of the exercise. Too often, an uncritical, habitual dependence on technology can actually be a distraction and a barrier to true understanding and progress, rather than a help. Use such resources wisely and sparingly. It far is better to build a sound foundation of knowledge, experience and skills that you have at your command and can draw upon whenever needed than to always rely on an outside agency.

![]()
“The greatest predictor of musical success is the quality and quantity of practice time.” ― Michael Griffin
Here are some valuable quotes from famous musicians, artists, actors, athletes, etc. that should inspire you to practice more regularly and with more focus and creativity.:
QUESTION: HOW MUCH SHOULD I PRACTICE?
ANSWER: The better question is “how often should I practice.”
Put this on a coffee mug, T-shirt, desk plaque, or poster:
IF YOU WANT
TO GET GOOD AT SOMETHING
YOU HAVE TO DO IT
SEVERAL TIMES PER DAY
Most people don’t practice every day. The ugly truth is that many people pick up the instrument only once or twice a week.
Then there are those who never practice at all, yet they continue to waste valuable time and money taking lessons.


“You can’t hire someone to practice for you.” ― H. Jackson Browne, Jr.
GOTTA SING!
GREAT PRACTICE TIP: Sing or at least say the song’s lyrics out loud as you practice the chord progression (don’t add a strum yet). Take note of which syllables the chord changes fall on. This is especially useful for people who have difficulty counting while playing their instrument. Doing this as you learn a song helps you to integrate the lyrics, harmony, and rhythm all at the same time. You will also better “internalize’ the song and even appreciate it more. When you are able to do the chord changes while saying/singing the lyrics at the right tempo, only then should you add the desired strum pattern.
Another benefit from practicing this way is that it may help you to eventually overcome any anxiety or shyness about singing. And that would be quite an accomplishment to be proud of!
GOTTA DANCE!
ANOTHER GREAT PRACTICE TIP: Move your body! If you’re sitting in your chair and not moving some part of your body while playing your instrument you’re doing it wrong. Foot tapping is often recommended but fatigue easily sets in. The better method is to relax your neck and shoulders and bob your head while you strum. You can bob up-and-down, sway side-to-side, or any combination of the two — just don’t be static. You can move your head on beat 1 only, or on beats 1 and 3, or on the backbeats (1 and 2), or even on all the beats, depending on the rhythm and tempo of the song.
When you start doing this you will notice that everything is connected: your chin will move up and down in synch with your strumming hand, and your shoulders and even your hips will follow suit. Your playing will improve and your enjoyment will increase, as will your audience’s!
NINE-YEAR OLD CODY DEMONSTRATES “RAINDROPS KEEP FALLING ON MY HEAD” UKULELE RHYTHM PART
Cody’s Cordoba Concert CM20 ukulele is the smoothest playing uke we have in our arsenal. He has logged a heckuva lot of hours on it, and it shows!
GREAT PERFORMANCE TIP: CONTRAST!
Play the fast songs fast! Play the loud songs loud! Play the slow songs slow! Play the soft songs soft!
Push the contrast! Use such artistic principles in your practicing and in your playing; your audience will be grateful.
Explanation: When we’re in a rut, things tend towards “the middle” (medium tempo, medium volume, medium intensity, etc. which is BO-O-O-RING!!!
Example: “Amazing Grace”
Take a deep breath and try to play “Amazing Grace” as slow as you dare. Strum the chords only on beat 1 of each measure; — let it breathe! Use a slow gliding downstroke so it sounds like a harp. Sometimes you will only need three or even just two notes of the chord. Less is more!
With a little extra thought and effort you can add more variety and interest to your practice sessions and your performances by being mindful of the connection between art and music.

THAT PESKY D CHORD
Congratulations! You’re not a beginner anymore, and you know how to play dozens of songs using chords in the key of C such as C, F, G, G7, Am, etc. But then you try to learn the D chord [2 2 2 0], and you hit a wall – your “fat” fingers just can’t do it, and you’re frustrated, and your rate of progress and the enjoyment you get from playing the uke has just taken a nosedive.

“Always plays a D chord with three fingers!”
Well, fear not, fellow ukesters! We have a couple of practical solutions to offer you:
Fingering Key: i = index, m = middle, r = ring, o = open string, x = mute or do not play string
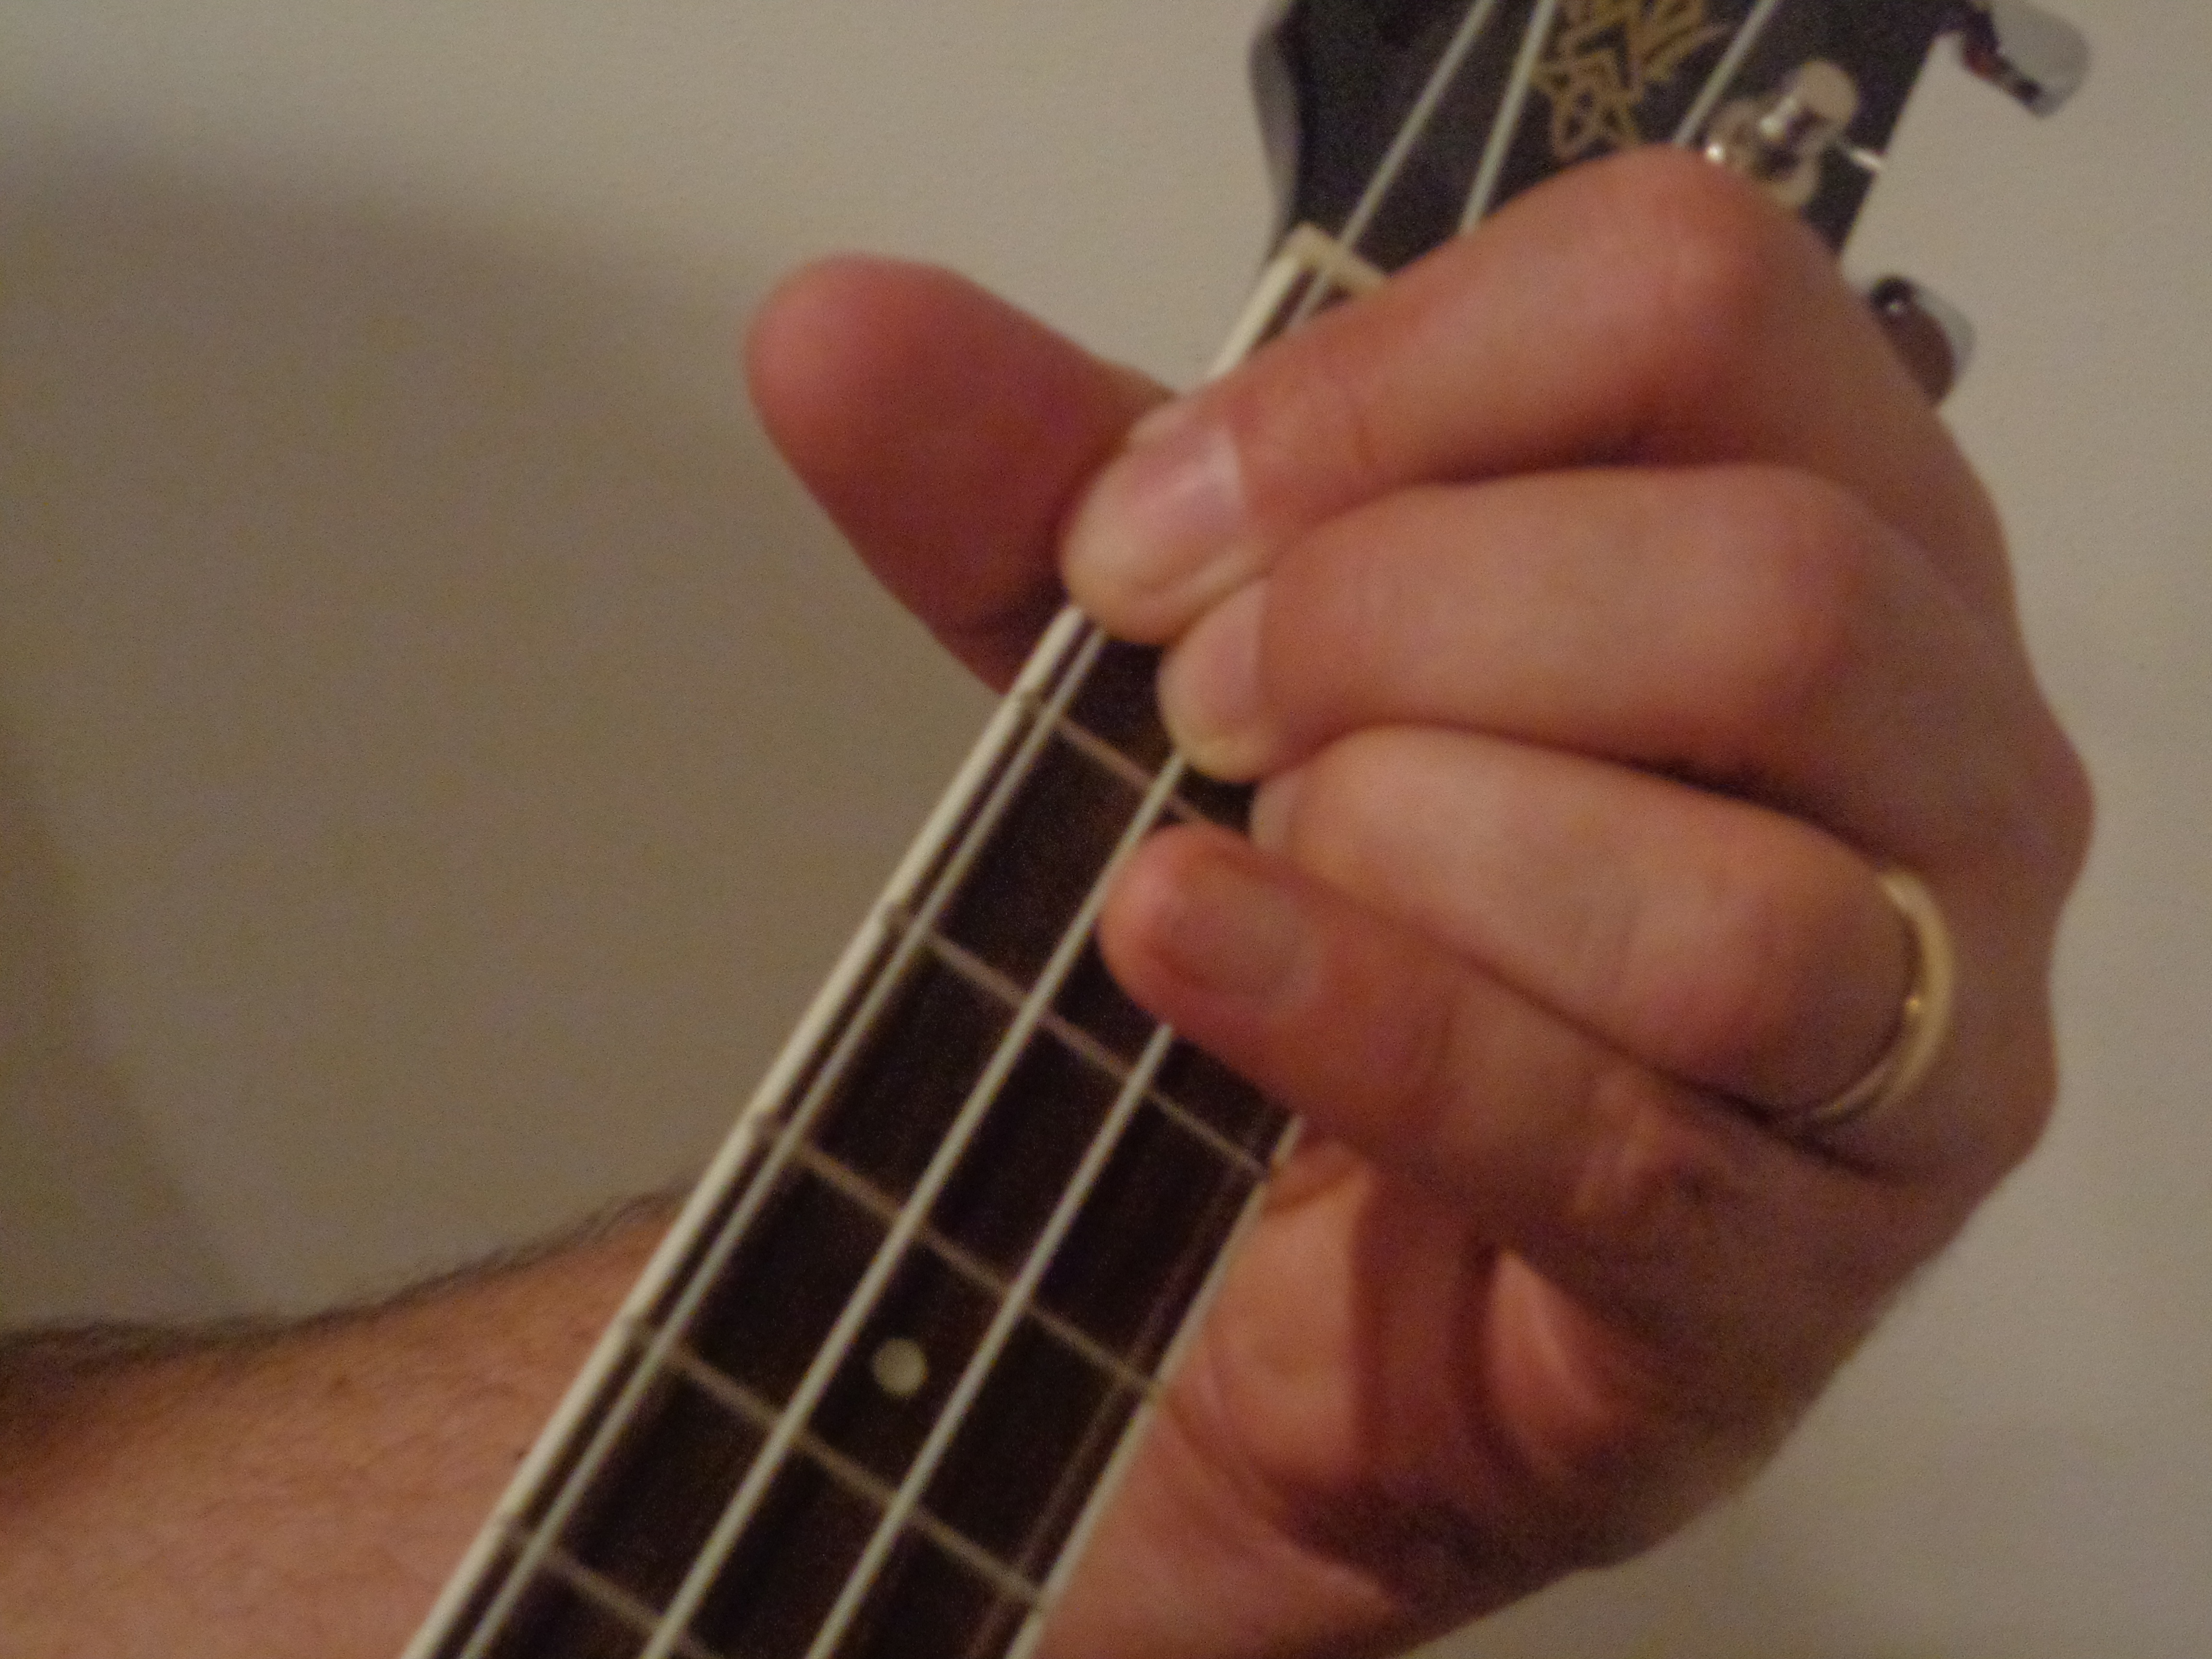
PHOTO #1. THE PROBLEM
A Fistful of Bananas!
Fingering = i m r o
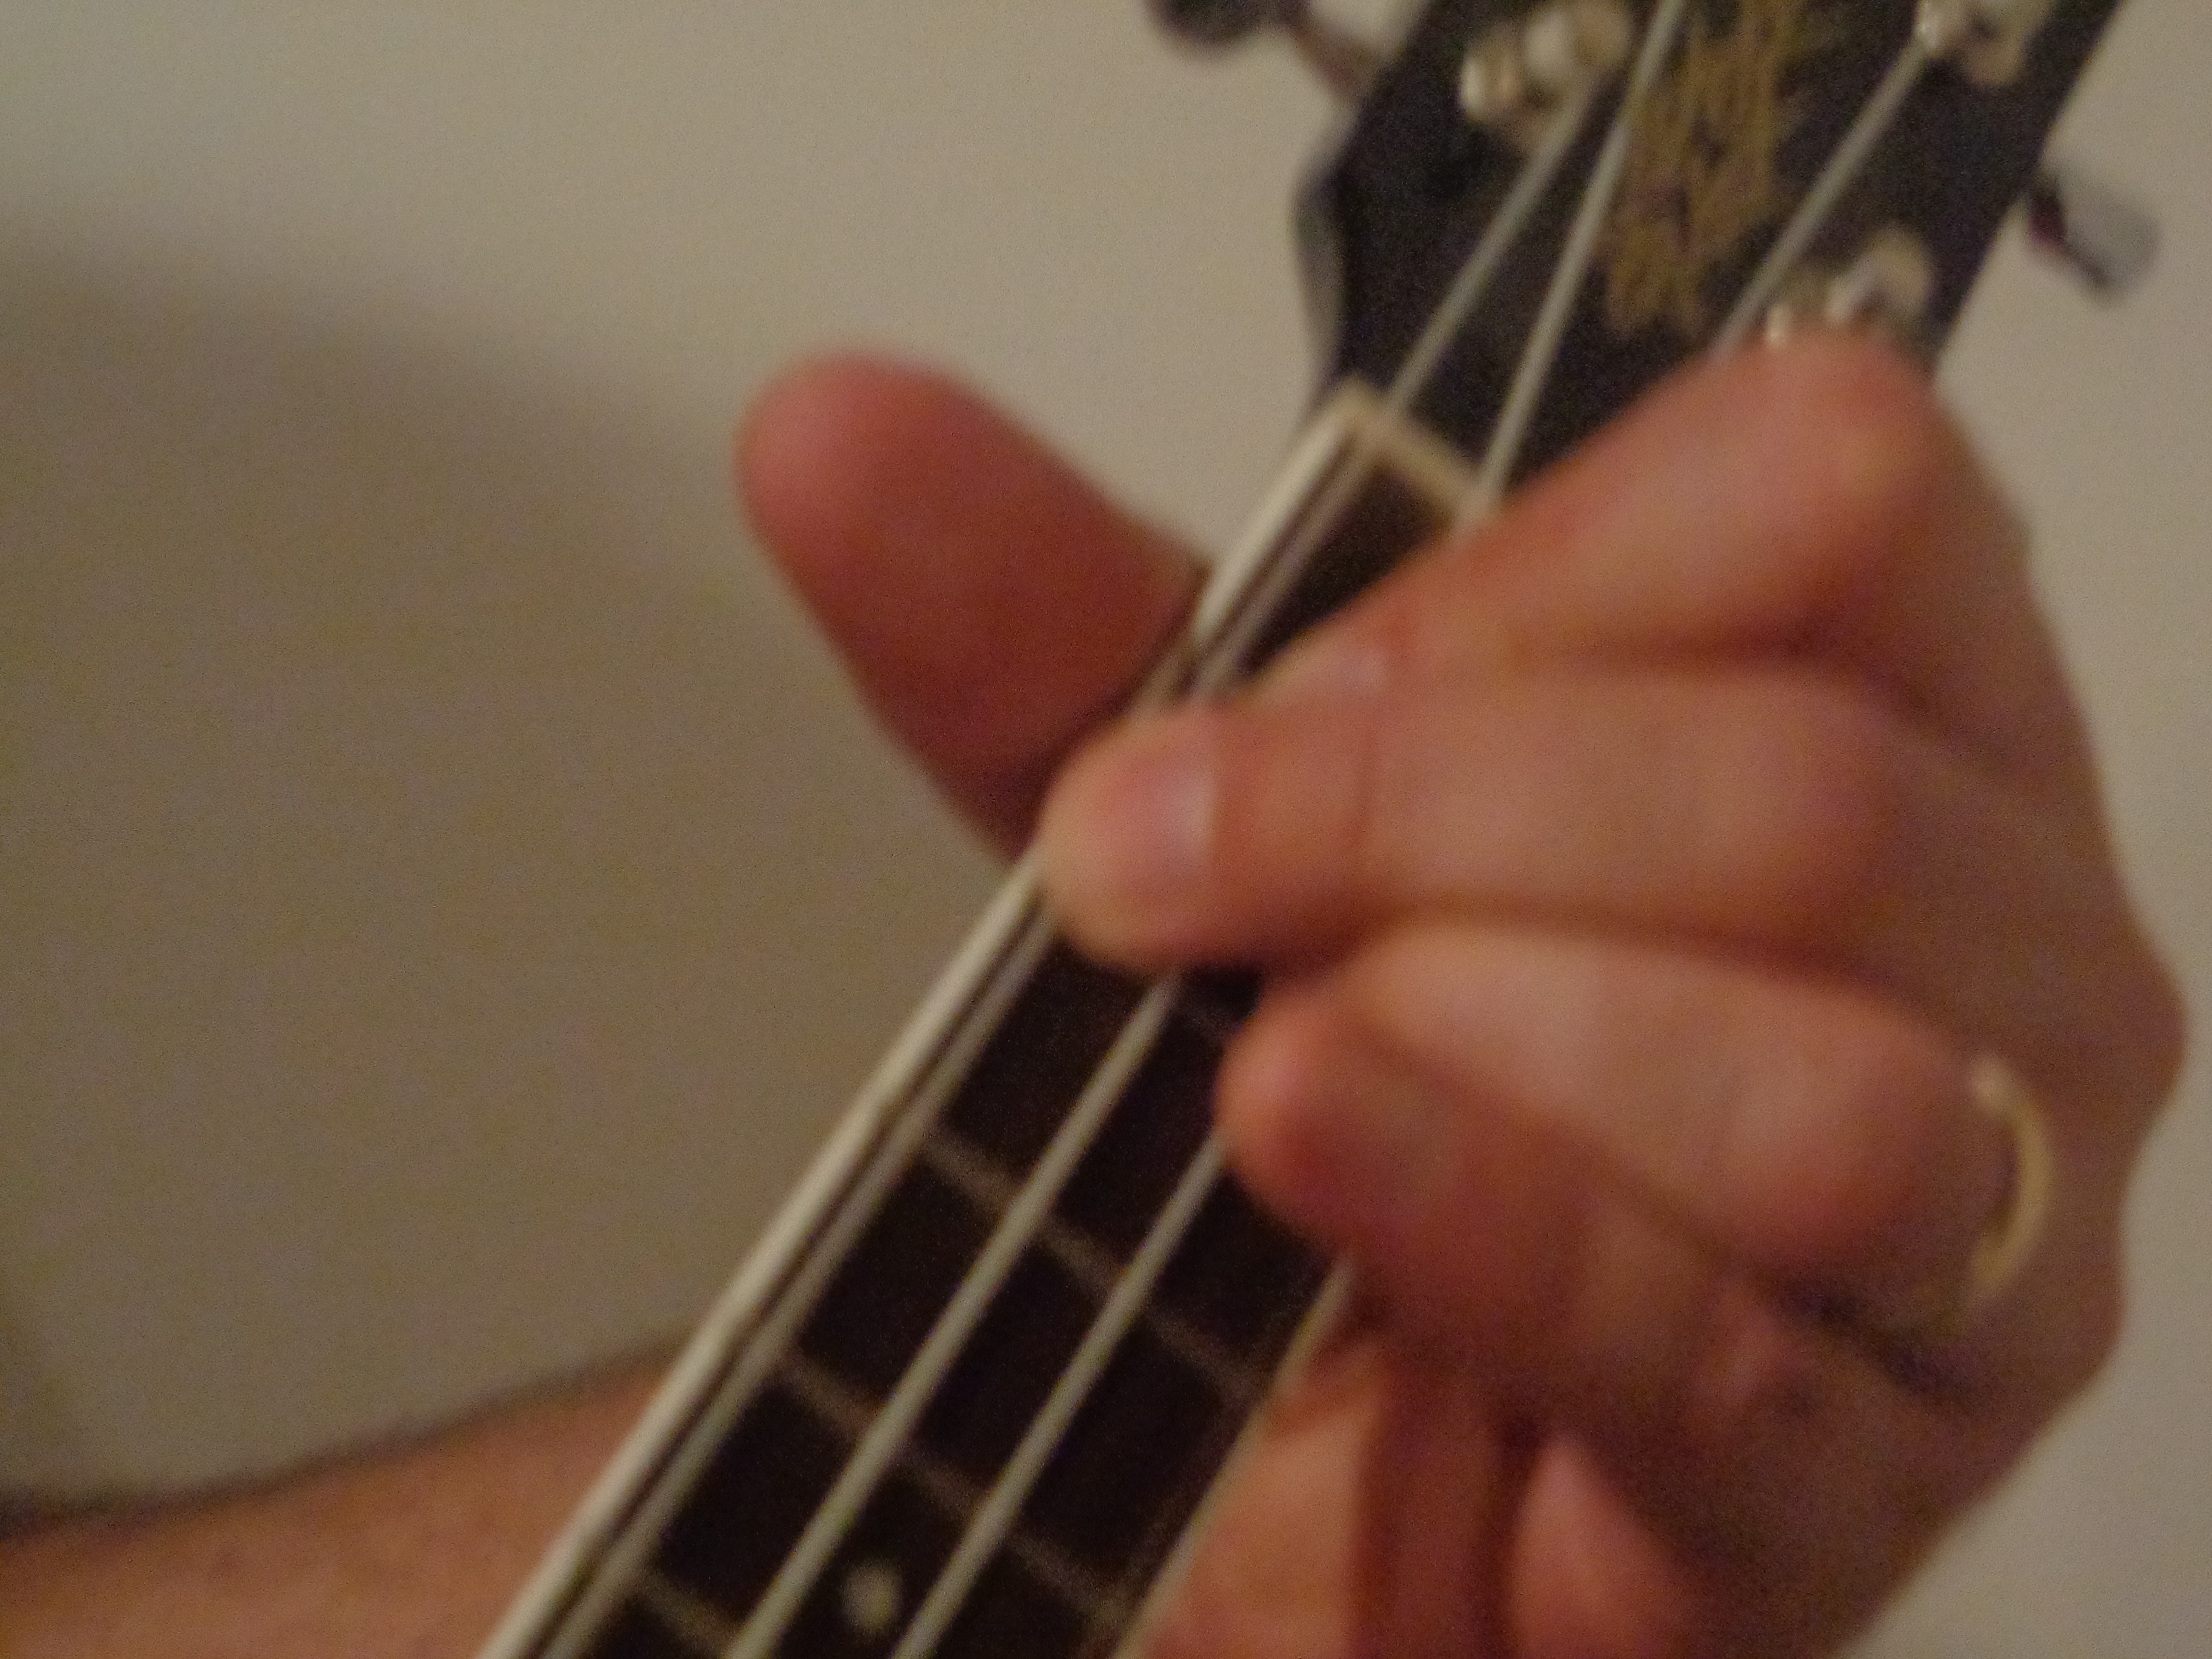
PHOTO #2. A NON-SOLUTION
Another Trainwreck!
Fingering = m i r o
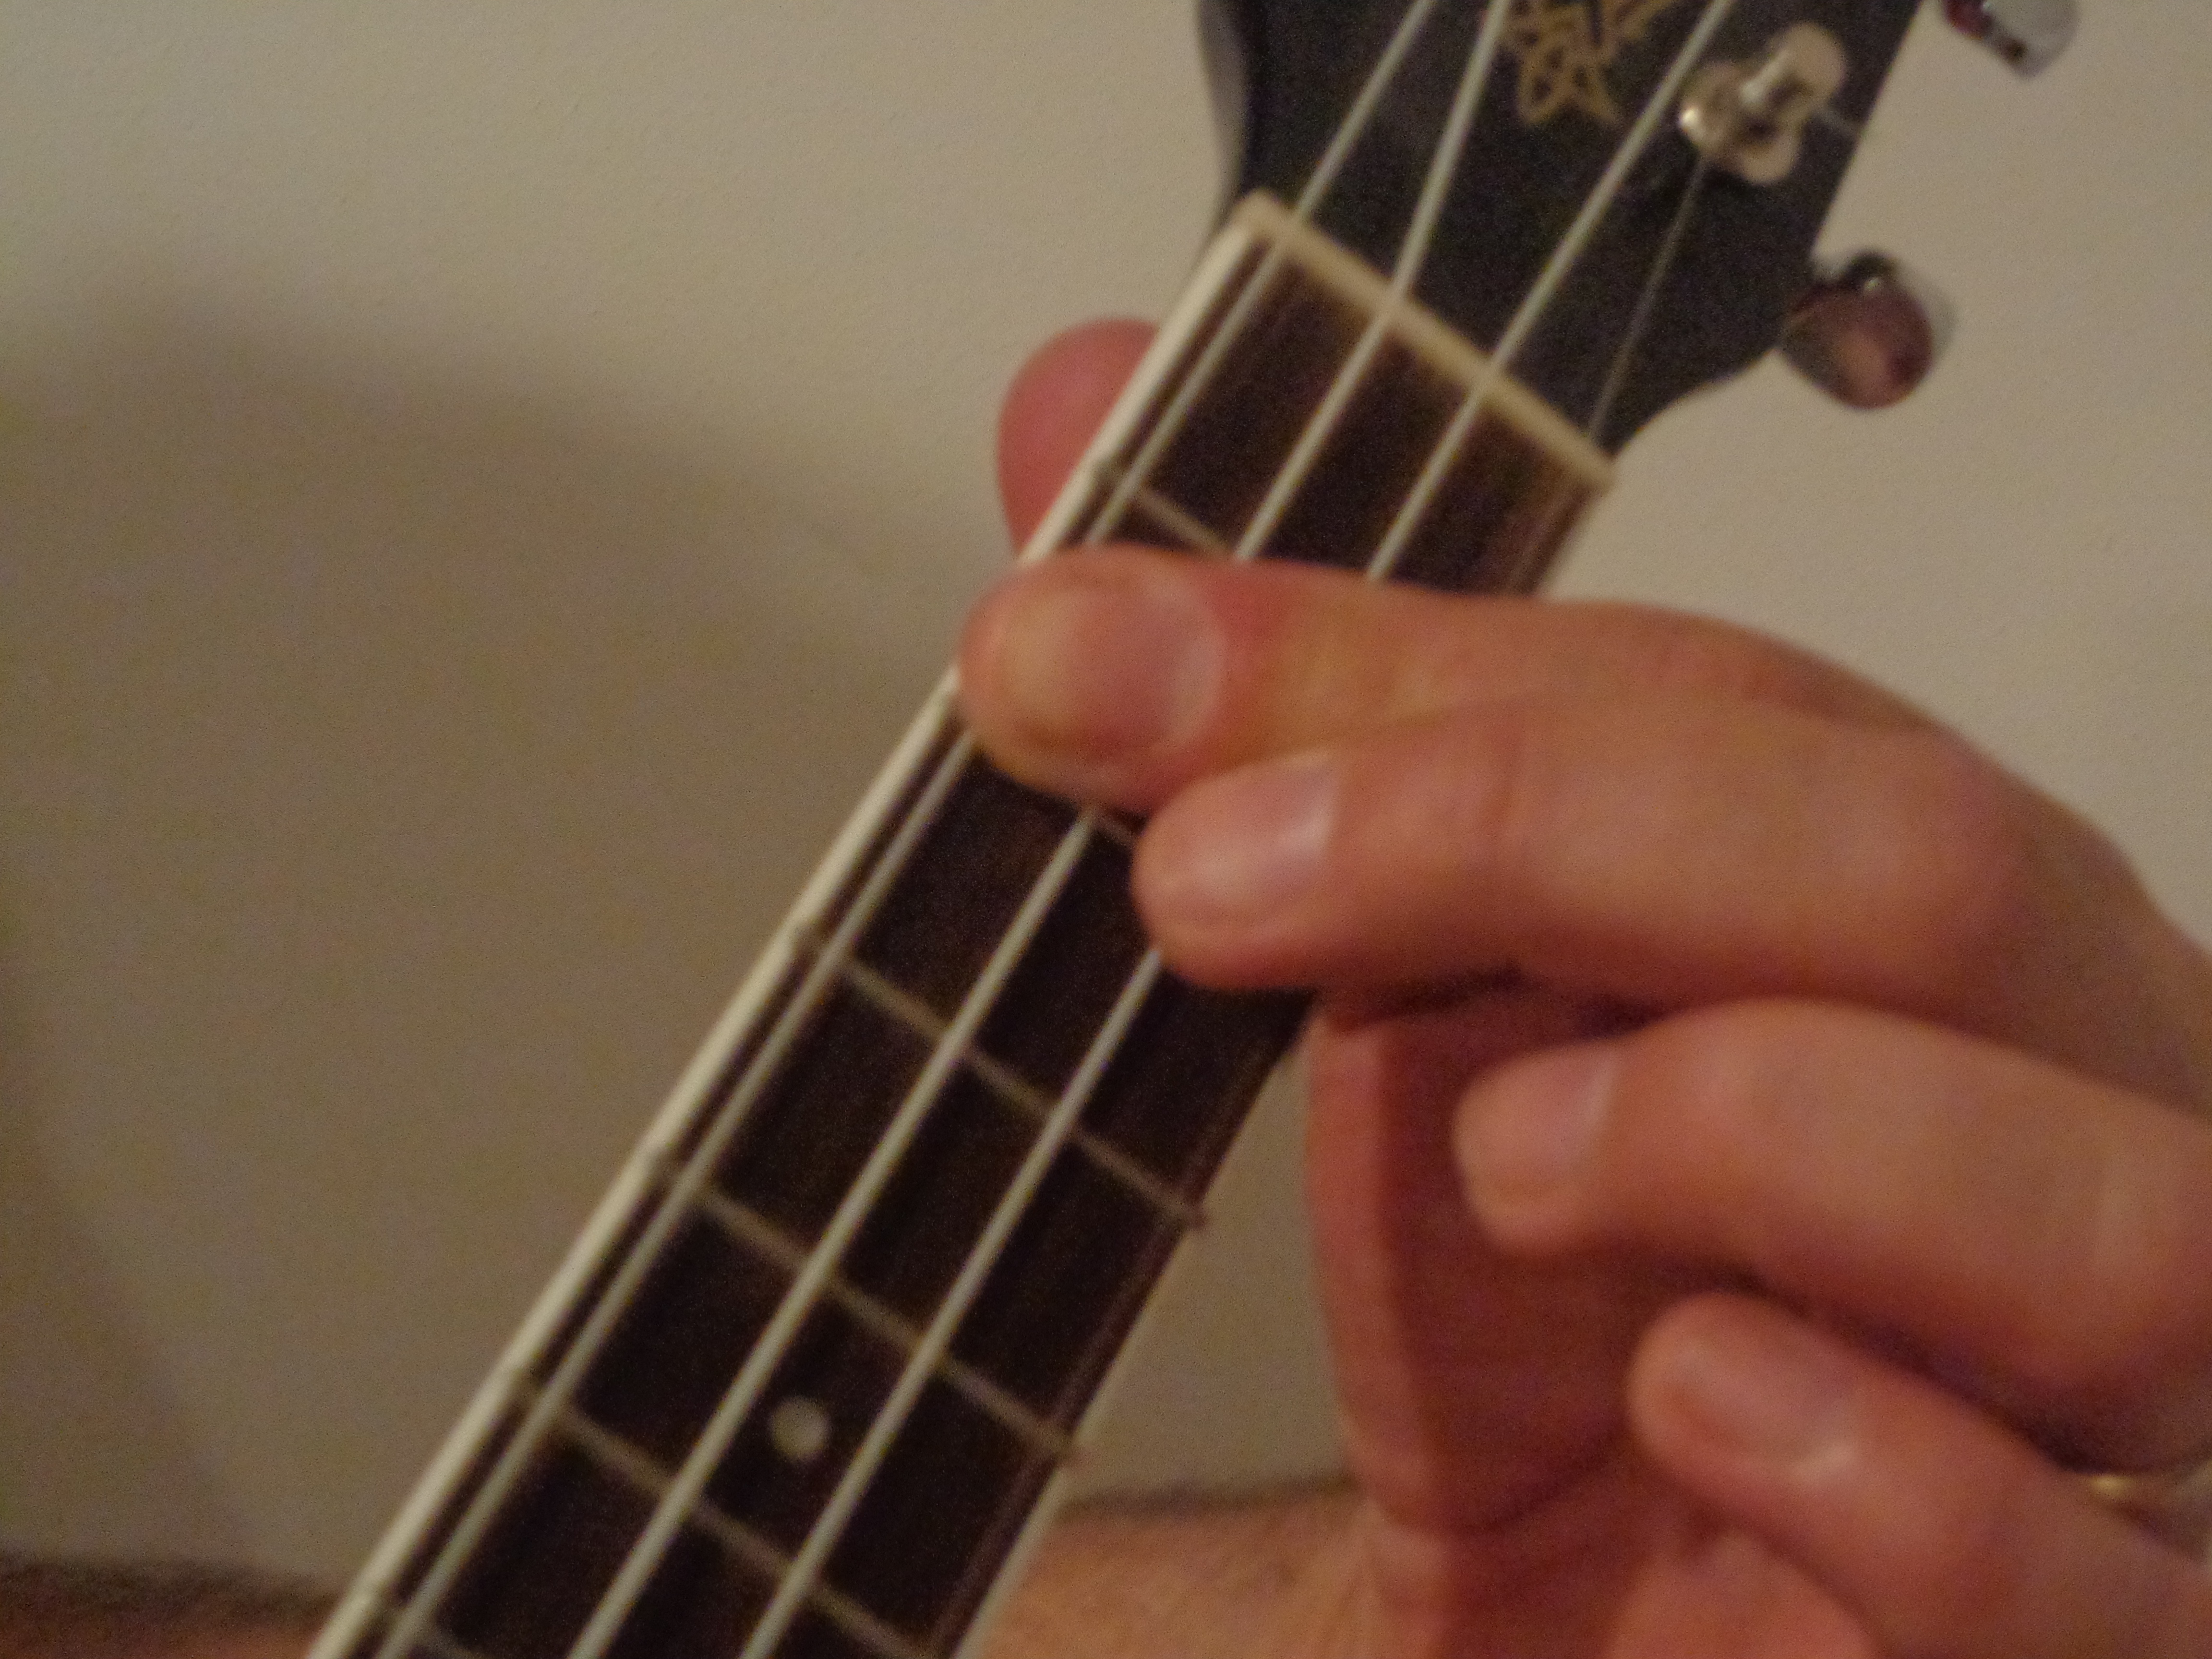
PHOTO #3. A QUICK FIX
Simple and Easy; One Finger Does It All!
Fingering = i i i x
One finger does all the work. You can barre with any finger, but the index finger is best, as it frees up the other fingers for other duties, if need be. The index finger should lightly touch the 1st string to mute or “dampen” it. With a little practice you’ll become accustomed to it.
The muted open string is a redundant note; you will lose the chorused effect of the doubled “unison” note but otherwise you’re still playing the three tones of the D chord (A, D, F#).
Flexible and movable; you can play the barre at any position.
The barre is very useful for minor chords on the uke as well. Example: Bm [X 2 2 2] can be played with this fingering: (x i i i). The index finger barres the 1st, 2nd, and 3rd strings. The leading edge of the index finger should make light contact with the 4th string to dampen, or mute, the string.
As you progress, you will discover that barres are required for more advanced chords, especially those played in positions farther up the fretboard.
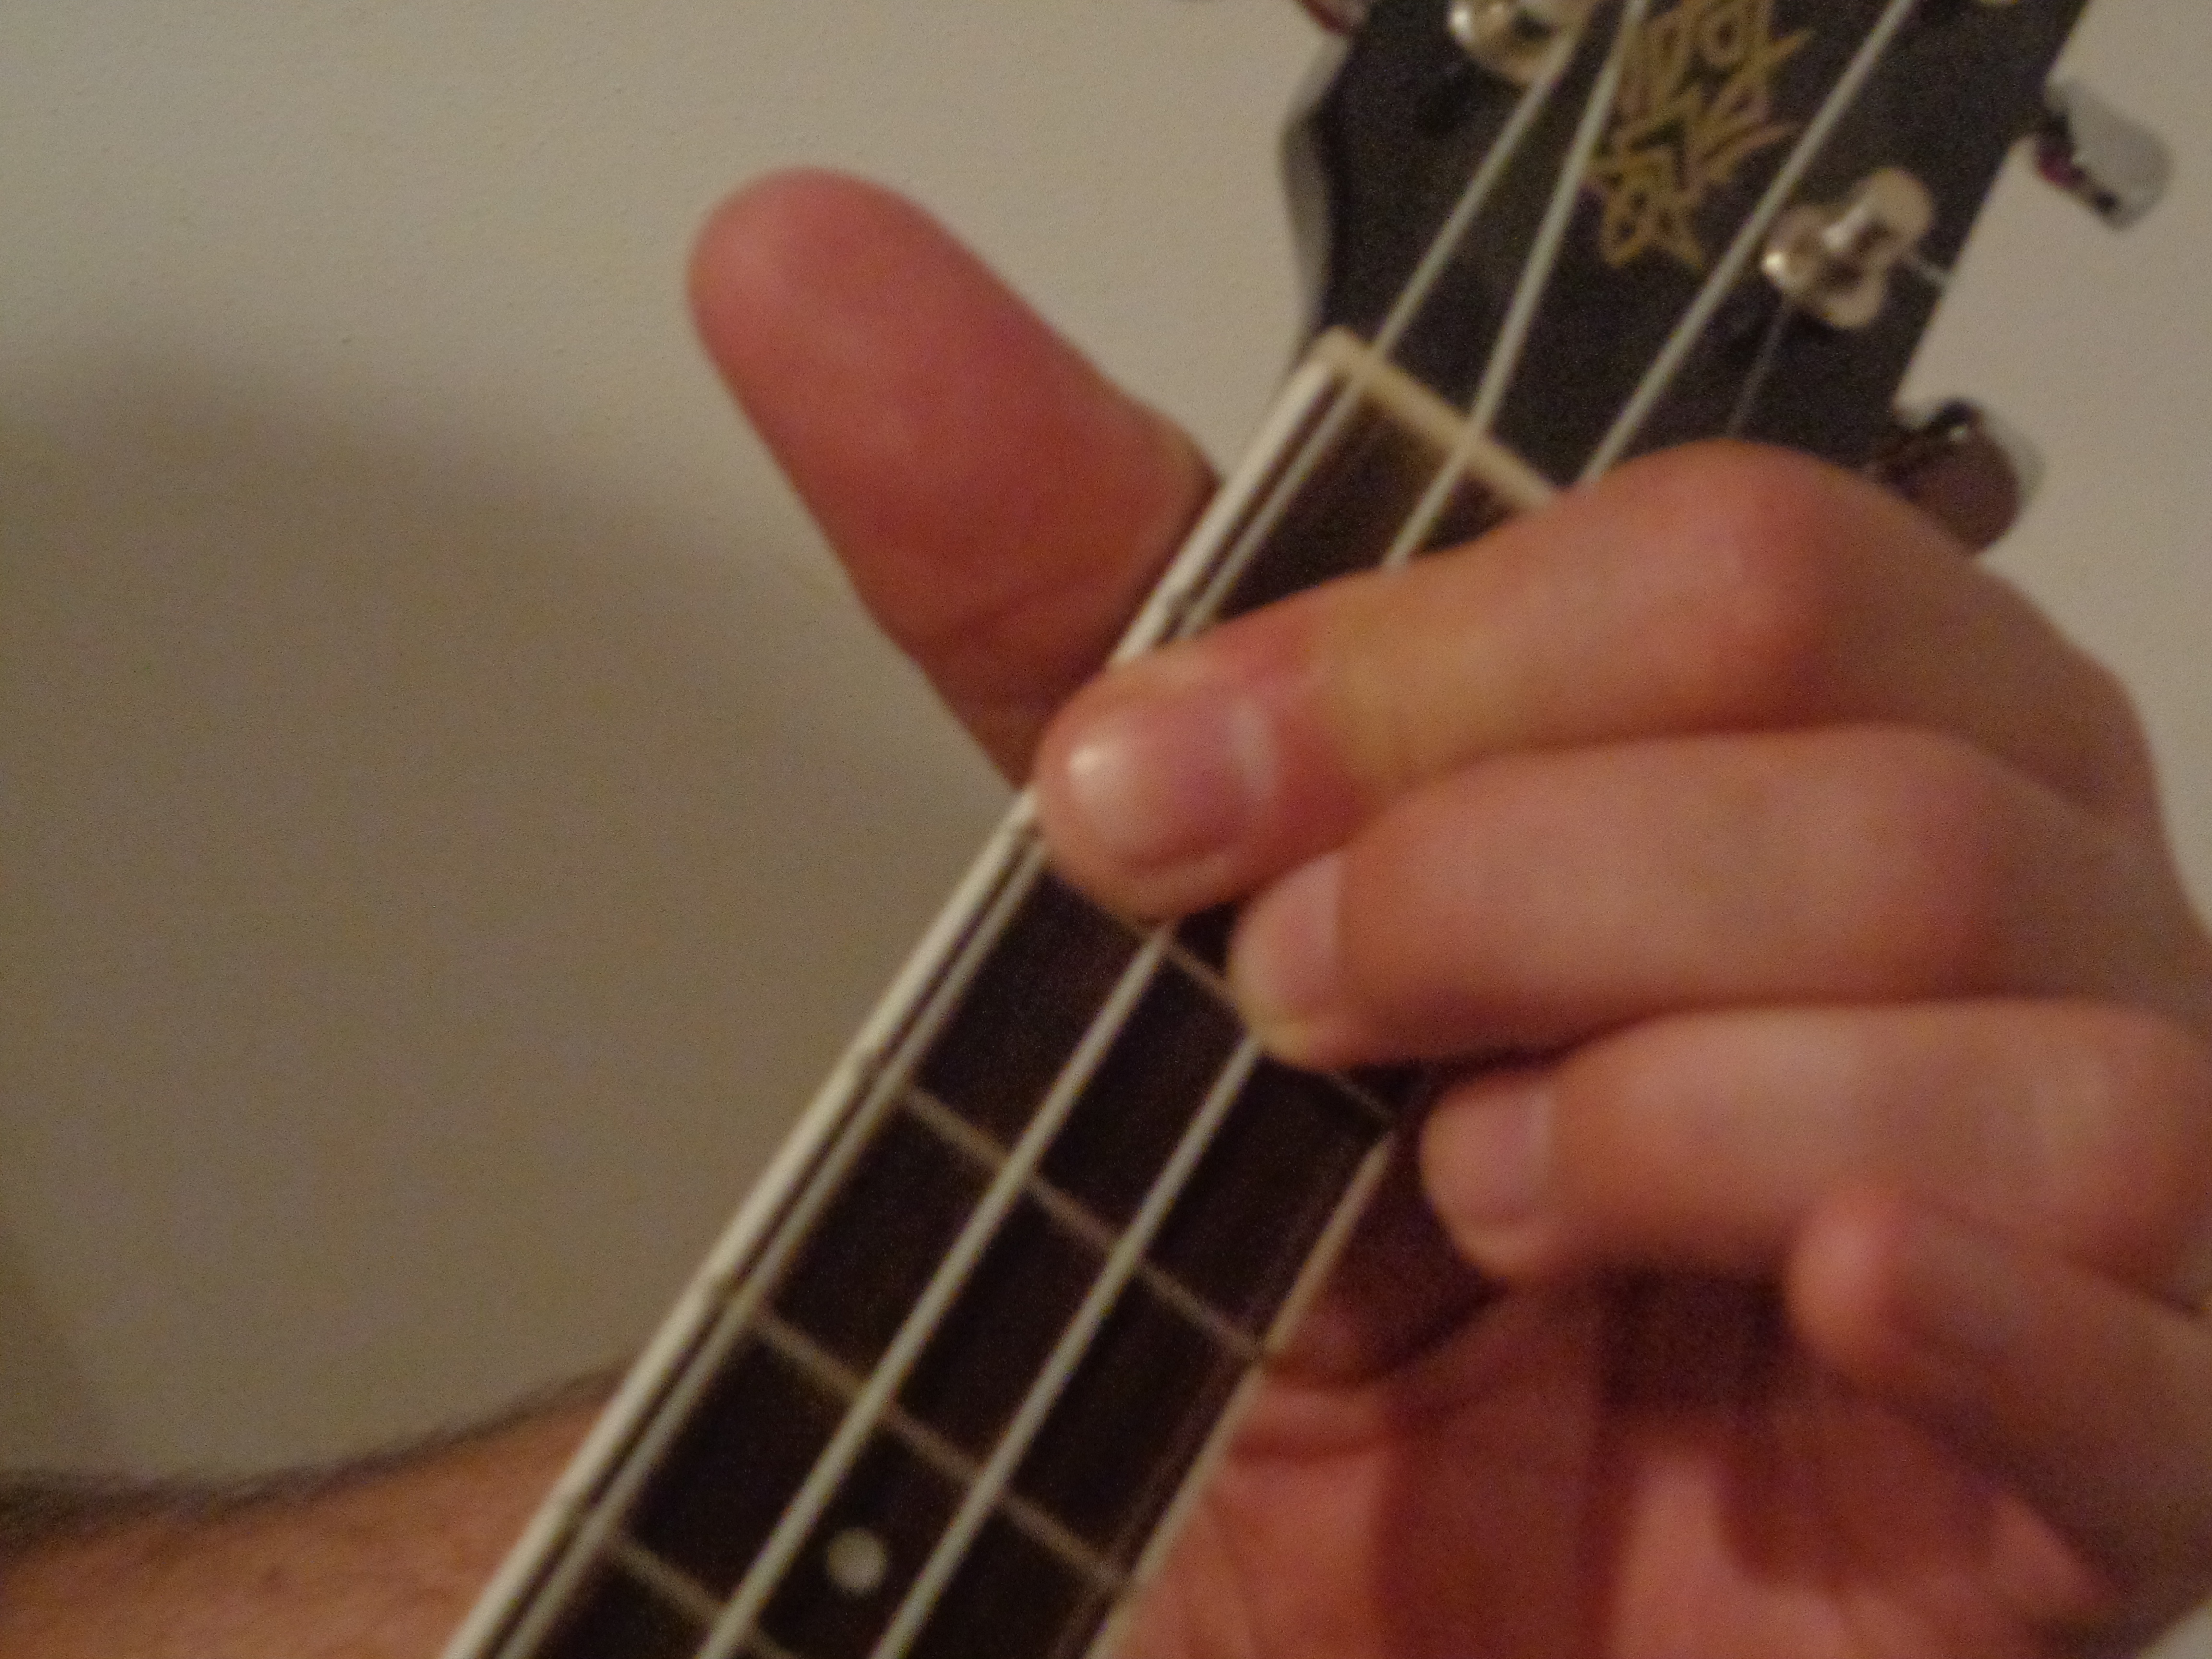
PHOTO #4. THE SOLUTION
A Partial Barre Does the Trick!
Fingering = i i m o
Here we have an easy and effective way to play the full D chord on the ukulele. The index finger barres the 4th and 3rd strings at the 2nd fret, and the middle finger comes straight down and cleanly stops the 2nd string on the 2nd fret. With the right pressure and angles, you should be able to hear all four notes ringing clearly and in tune.
Note to Guitarists: This solution works well for the full-voiced open-A chord [X 0 2 2 2 0] Fingering = x o i i m o
WHAT’S A G5 CHORD?
Consider the chord progression G D7 G. Strum each chord one time:
G = 0 2 3 2 D7 = 2 0 2 0 G = 0 2 3 2
Now play this:
G = 0 2 3 2 D7 = 2 0 2 0 G5 = 0 2 3 X
NOTE: The fingering for the G5 chord = o i r x, where o = open, i = index, r = ring, and x = mute. Use the ring finger to lean on the 1st string and “dampen” it.
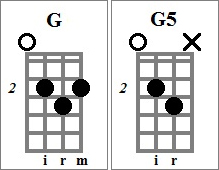
It sounds like “Three Blind Mice” now, doesn’t it? We shaved off the highest note of the second G chord in the progression. That high note would compete with the melody note and cause confusion, so we omit it. Now, the highest note in the G5 chord matches and reinforces the melody note, which sounds better and gives a sense of completion and stability to the phrase. This is why our music often has a G5 chord at the end of a verse, chorus, or song when the song is in the key of G. Many ukulele and guitar songs are in the key of G, so the G5 chord comes in very handy.
“Voicing” a chord lower is a nice device that will improve your accompaniment and the sound of your ensemble. In the Green Bay Ukulele Club we regularly use lower uke and guitar chord voicings in our music. Next is another example of this principle at work:
WHAT’S AN F5 CHORD?
Compare these two chords: F = 2 0 1 0 F5 = X 0 1 X
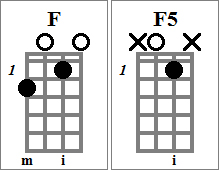
The F5 — which has fewer notes in it — sounds better in certain situations, such as at the end of a song or phrase. See “What’s a G5 Chord?” above for a more detailed explanation.
As a general rule, we “voice” a chord differently than usual if it sounds better in the overall mix with the melody and other instruments.
WHAT ARE THESE CHORDS WITH SLASHES IN THEM (F/G, D/F#, etc.)?
We’re glad you asked! A “slash” chord is a chord with a different bass note than it would normally have. For instance, an F chord normally has an F as its bass note. That F bass note is called the “root” of the chord, and hence, the chord is “rooted.” A slash chord, such as an F/G chord, is an F chord played with a G in the bass instead of an F. It has a “jazzy,” suspended sound (check out its use in “Daniel” by Elton John).
Another example is the D/F# chord, which is fairly common in guitar music, especially in songs played in the key of G. You should simply think of it as a D chord with an F# in the bass.
There are three things to keep in mind when playing slash chords in ensembles:
- Ukes normally just play the chord to the left of the slash and ignore the bass note to the right of the slash.
- Guitars play both the chord to the left of the slash and the bass note to the right of the slash.
- Bass instruments play the bass note to the right of the slash.
Slash chords indicate that something interesting and independent of the chord progression is happening in the bass register. They can indicate either of the following:
- The bass line is descending underneath the chord progression.
- The bass line is ascending underneath the chord progression.
- The bass note is staying the same while the chords above it are changing (this is called “pedal” bass).
- The bass is playing a different note of the chord other than its root (this is called an “inversion).
- Or simply the bass is playing an alternate bass note just to add color or tension to the chord.
Don’t be intimidated by slash chords, or any other unusual chords, for that matter. They will add interest and sophistication to your music. Besides, that’s how the pros do it!
“PRIMARY” CHORDS
Memorize the three primary (most important) chords in each of these keys:
1. Key of C = CFG
2. Key of G = GCD
3. Key of D = DGA
4. Key of A = ADE
5. Key of E = EAB
These are the chords you will play most often, so pick a key and practice switching between the three chords in that key.
“LESS IS MORE”
When I play guitar with uke groups, the chords I play generally emphasize the bass line and lowest voices of the chords. That’s why many of the guitar chord annotations in our music have X’s in them; the two highest strings are often not played. There are several reasons for this:
- Each class of instruments has its own register, and the different instruments don’t overlap and clash with each other.
- The uke parts are easier to hear because the guitars don’t conflict with them.
- The guitar parts are easier to hear because the ukes don’t conflict with them.
- Less is more. Big chords with lots of notes in them do not necessarily more music make. Quality; not quantity!
- The overall sound of the ensemble is much improved.
- More variety in the arrangement and composition is possible when the different classes of instruments have their own unique roles to play.
- And finally, nothing is more annoying to the listening audience than when everybody’s playing the same thing the same way!

THOSE LOVELY “DIMINISHED” CHORDS
Don’t be afraid of those diminished 7th chords (C#dim7, Fdim7, etc.) Learn ’em and love ’em! They are beautiful and will add spice and sophistication to your music. They are often used as “transition” chords that introduce a leading tone as one chord “morphs” or changes into another. For this reason, they sometimes last only one or two beats, but they sound great.
Dim7 chords can sound either sad, bitter sweet, bright and happy, or be portents of impending doom!
Many of the great Christmas songs have dim7 chords in them. A great example of a dim7 chord at work is in the last line of the chorus of “Jingle Bells”:
F C C#dim7 G7 C
“Oh, what fun it is to ride in a one-horse open sleigh!”
The inclusion of the C#dim7 chord for two beats on the word “ride” gives it a bright “Christmassy” feel.
Much of Johnny Marks’ popular Christmas songs such as “Rudolph the Red-Nosed Reindeer,” “A Holly Jolly Christmas,” and “Silver and Gold” employ dim7 chords in the “sweet spots” of the songs.
So, make an effort to add these chords to your playing; it will be well worth it. Even if you still humbly consider yourself merely a beginner, they will make you sound like you really know what you’re doing! An index finger barre works well when the chord has no open string notes in it. With such a barre they are movable forms and can be easily played up and down the neck in different positions.
THE DIFFERENCE BETWEEN MUSICIANS AND EVERYONE ELSE
One thing I’ve noticed is that the musicians I’ve talked to (whether they are singers or instrumentalists) hum, sing, tap, bob their heads, slap their thighs, etc. at any time of the day. My boys do it all the time — when they’re watching baseball, playing video games, talking a walk, during idle moments, just about anytime, anywhere. Music is a significant part of their lives; they have internalized it.
I won’t go so far as suggesting that Handel’s “Hallelujah Chorus” was sung, written, and composed in the shower, but then again, I think it’s a difference still worth mentioning. I confess that I pretty much taught myself “Stairway to Heaven” and “Freebird” during history class in high school by playing air guitar under my desk (I actually faded many pairs of jeans along the side-seam where my strumming hand made contact!). This is not so far-fetched. I was reinforcing the necessary neural connections and muscle memory, and perhaps more importantly, developing the melodic rhythm and picking/strumming patterns for the right hand. This sounds a lot like athletic training, doesn’t it? Hhhmmm . . .
To sum up, if you want to be good at music, you have to make it an integral part of your life, at the most basic — and some would say, trivial — level. Don’t be a stranger to music; make it your friend and constant companion. The worst thing you could do is have so high a regard for it that you allow the intimidation factor to overwhelm you.

“Hey, that’s some pretty good advice!”
HOW TO TURN YOUR GUITAR INTO AN INSTANT UKULELE
A FUN TIP! Most of the tablature on this website provides parts for at least two ukuleles. If you want to play together with a partner but you have one uke and one guitar, or two guitars and no ukes whatsoever, you can still play these duets in their intended key! Here’s how:
If you have a guitar, but want to play a ukulele part, a capo will do the trick.
EXPLANATION:
The strings of a guitar in standard tuning are tuned to these pitches (from low to high): E A D G B E
With the capo at the 5th fret, the strings are now these pitches: A D G C E A
Most ukuleles in standard tuning are tuned this way: g C E A
(That lower-case “G” is not a typo, it indicates that the string is tuned one octave higher than it would normally be, and that condition is known as “reentrant tuning.” It gives the uke a chorused “banjoey” sound.)
Some uke players use a heavier gauge G String, tuned an octave lower: G C E A
Now that equals exactly the same pitches of the last 4 strings of a guitar with a capo at the 5th fret!
So, if you don’t have a ukulele, but at least you have a guitar, you can play all the sheet music, chords, tablature, etc. on this website! How cool is that?!
“You mean I can turn my guitar into a ukulele?”

“Why didn’t someone tell me that before?!!!”
RIGHTY OR LEFTY?
Maaaybeee Lefty, IF and ONLY IF . . .:
- You have already mastered another instrument, and possess a good understanding of music theory.
- You are independently wealthy, and have a lot of free time on your hands to devote to learning the instrument.
- You are a stubborn free spirit who has little regard for established authority and insist on doing things your own way. (If so, read no further and get back to your epic but treacherous journey of exploration and discovery!)
For the rest of you left-handed people out there, I strongly suggest that you learn to play your instrument right-handed.

THAT gBEA TUNING – WHY EVEN BOTHER?
PROBLEM: There are many songs in their original key that have a B as the lowest note in the melody. Unfortunately, the lowest note available on a standard tuned uke [gCEA] is the open 3rd string, the C. This problem is usually solved by transposing the song into a more uke-friendly key, such as C, G, or F.
SOLUTION: When you need that lower B in the ukulele melody (or other part), all you have to do is tune that 3rd string down one half-step from C to B. It’s only a small change and in this age of electronic tuners it’s no big deal.
Uke in standard tuning => [gCEA]. Change it to this => [gBEA]
We, at the Green Bay Ukulele Club prefer to keep the songs in their original key as much as possible for many good reasons, such as:
- You can play and sing along with the original recording.
- The original song featured a guitar or bass riff that is specific to the characteristics of the guitar, and we didn’t want to alter that in the club’s ensemble arrangement. This is particularly true for songs that are in the key of E, which is very guitar-friendly, but not so friendly for a uke in standard tuning.
- We didn’t want to change the key so that the vocal part(s) would be easier to sing.
- You can jam the song along with others who have learned to play it on their instruments in its original key, so that you’re not being the “pushy” uke player who has to do it a different way.
NOTE: To play chords on a uke tuned to [gBEA] you must remember to raise the chord note on the 3rd string one fret higher.
KNOWLEDGE, INTELLIGENCE, SMARTS, AND WISDOM
These words are often used interchangeably but they don’t really mean the same thing:
KNOWLEDGE = facts, data, information, etc.
INTELLIGENCE = book smarts, IQ
SMARTS = instincts, street smarts, common sense
WISDOM = (knowledge + intelligence + smarts) x (experience and maturity)
Every individual possesses these four traits in different measure (we all know the cliché about the absent-minded college professor who can’t tie his own shoes). You should try to use all four of them when learning and developing the skills needed to play a musical instrument. For instance, you first acquire new KNOWLEDGE and right away you try to use your INTELLIGENCE when instead you should have applied your SMARTS. (If you had used any WISDOM you would have known that already.) That is to say, street smarts and experience are the keys to really learning new things in meaningful ways.
In the public mind it seems that playing a musical instrument is often associated with high intelligence and academic ability but my teaching experience tells me that so-called “intelligent” and “knowledgeable” people are not always the best students when it comes to learning how to play a musical instrument. They often “can’t see the forest for the trees” because they are too fixated on small details and hence they miss The Big Picture. Some of them are also self-admitted “control freaks” or perfectionists who are easily frustrated when they fail to achieve their goals right away. They are often their own worst enemy.
The advice you will find in these tutorials and throughout this website is most often in the realms of SMARTS and WISDOM. It is based on a half-century of EXPERIENCE learning, mastering, and then sharing with others the JOYS of playing a musical instrument.
Don’t be like these guys:

GET YOURSELF A BASS UKE
The old line is that the bass player is the least glamorous of the roles in a band. That may possibly be true to some degree when it comes to simple rock ‘n’ roll and country songs but in genres like blues, jazz, old standards and classical the bass plays a very important part. In fact, in much jazz and rhythm & blues “the Bass Is King!”
If you already play uke or guitar and want to try something fun and different without a steep learning curve, a uke bass is an excellent choice. If you have a small group or a full ensemble, think of all the new possibilities the addition of a bass instrument would provide. And if you are an already good guitarist or uke player, you would be center stage when playing those catchy Motown song riffs.
One last thought: since the bass part is often very simple and easy to play, it is a great way to get someone playing an instrument who doesn’t have the time or inclination to learn a more demanding instrument such as guitar or ukulele.
HOW TO PLAY A MELODY AN OCTAVE HIGHER
Many melodies played in the lower positions on the fretboard can be easily transposed and played one octave higher. Any note played 12 frets higher on the same string is exactly one octave higher.
HOW TO DO IT: Don’t try to actually count and add 12 frets to each note – that’s clumsy, time-consuming, and mentally fatiguing. Instead, use the 12th fret as a reference point. If you didn’t already know it, the 12th fret is the octave of the open string. In other words, the 12th fret on the 1st string (the A string) is the A note one octave higher than the A note you get when you play the string open. Got that?
Here’s how to visualize the melody one octave higher:
The 12th fret is where you are now going to play all open string notes (0’s = 12th fret)
1’s = 13th fret
2’s = 14th fret
3’s = 15th fret
EXAMPLE: “Jingle Bells” Chorus (first phrase)
BEFORE
E String: 0 0 0 0 0 0 0 3 0
C String: 0 2
AFTER
E String: 12 12 12 12 12 12 12 15 12
C String: 12 14
Reinforcing the melody one octave higher (or lower) is a useful and time-honored compositional device. It will reinforce and enhance your ensemble’s sound.
HOW TO HARMONIZE A MELODY
Music arranged for “solo ukulele” includes the melody plus harmony played together simultaneously by one player. Here is a short list of rules for “harmonizing” a melody. With practice and experience you will eventually develop the ability to do it “on the spot” at tempo when only given the melody, basic chord notations, and time signature. It is a very fun and rewarding skill to have. Try it with simple two and three chord songs first.
- First, move as many of the melody notes to the 1st and 2nd strings as possible.
- Add notes from the chords on every 1st beat and on any other beat that has a chord or a new chord.
- Important Rule: With rare exception, do not add any chord notes that are higher than the melody note being harmonized.
- Add any extra harmony notes on important beats or in strategic locations.
- Try to incorporate ascending or descending bass lines, or pedal bass notes in your harmonies. (These are often indicated by “slash” chords, such as in the progression: C C/B C/A C/G.)
- Last Rule: If it sounds good, do it!
SOME EXAMPLES OF HARMONIZED MELODIES ON THIS WEBSITE:
“UNPRACTICING”
Both of my sons are excellent musicians. They are also excellent baseball players. They set goals for themselves, work hard, and practice regularly and often. But they sometimes need to be reminded to practice “smart.” Lazy footwork, sloppy mechanics, and then the throw is off target, and the opposing team gets extra bases and runs. The same is true with music, or any human endeavor that requires the development of skill through repetitive practice.
When you practice wrong, you are “unpracticing” – you are literally doing damage to any progress you have made so far to this point. And if your practice sessions use sloppy technique and/ or poor mechanics you will develop bad habits that limit your ability to make further progress.
An excellent example of a bad habit is this: anchoring your strumming/picking hand to the instrument. Gripping the bottom edge or putting your fingers on the body of your instrument might give you the stability you need at an early stage of learning to play but it’s a “cheat” that has severe consequences further down the road. What’s going to happen later when you want to learn how to play melodies with eighth notes or even faster notes? Your hand will need to be free of the instrument, but you’ve “ball-and-chained” your hand and now you have to start all over and learn proper right hand placement and technique.
Now, to be fair, you may observe professional players on occasion who anchor their hand like that, and my response to that is this: 1.) They are singer/entertainers more than instrumentalists who suffer the same limitations as anyone else by using that technique, and/or 2.) They are versatile and able to use multiple right hand techniques depending on the situation, and from time to time you might see them playing with an anchored hand.
However, as a general rule, it is best to avoid such crutches at the start; a good teacher will point out the pitfalls and will help prevent you from acquiring them. Such bad habits are VERY difficult to unlearn. We teachers spent a large amount of time and energy correcting self-taught students who have fallen into these traps.

“Yup.”
A NOTE TO THE PERFECTIONISTS OUT THERE
Some people smugly declare themselves “perfectionists” and assume it is some kind of virtue. But they do themselves a disservice by applying such a “label” to themselves. We don’t like it when other people label us (it saps our motivation and limits our potential) and we also shouldn’t like it when we do it to ourselves either. It is self-confining and self-defeating – Life (with a capital “L”) throws enough punches and disappointments at us and we don’t need to make it any worse.
This wrong-headed notion of perfectionism is actually a fear of failure wearing a tough guy’s mask. The damage done to heart, mind and soul by such negative self-fulfilling prophecy is far greater than the mistakes we fear making in the first place. Why short-change yourself?
I’ve heard many people say they would like to be able to draw well but that they “can’t even draw a straight line.” NEWSFLASH: If an artist wants to draw a straight line, he/she’ll use a ruler, just like anybody else.
I’ve had students (young and old) say they are perfectionists and don’t like to make mistakes, and confess that that’s the reason why they don’t practice. Now where’s the logic in that?
ANOTHER NEWSFLASH:
Mistakes are how you learn!
And the majority of my students refuse to sing while they play; they are missing out on one of the deep joys of playing music. That’s a real shame, because the ukulele is such a wonderful instrument for singing; it literally “invites” you to sing with it! The uke is so unassuming and friendly – so what if you can’t sing well – JUST DO IT! You will get better, and you’ll have a lot of fun!
I can’t tell you how many of Life’s important lessons I have learned by making mistakes. In fact, I should wear a T-shirt that says “I’ll Never Do That Again!” These valuable lessons stick with you for life because of the memory of those mistakes.
Don’t make a mistake trying to be a perfectionist.

UNPLUG
Do yourself a favor and unplug for a while from all those technological time vampires that suck up so much of your day and scramble your brain. Practicing your instrument is a great way to relax and regain your focus. Make it a priority and incorporate it into your daily routine. It will sharpen your mind and boost your spirit. Give your lifestyle some “style.”

